DIY
10 DIY projects to keep the kids busy
Our Service
What Can we do for you?
Acorn ITM
Few words about us
With 25 years in the Waikato, the team at Acorn ITM can help with any job, big or small! Whatever it may be we’ll see you right!
Contact Details
Feel Free to Contact Us
- Free Phone 0800 226 664
- Email sales@acornbuilding.co.nz
-
Address
102 Riverlea Road
Hillcrest,Hamilton

10 DIY projects to keep the kids busy
So the school holidays have come around again and you have to entertain the kids! Here are a few ideas to keep them busy and having fun.
1. Foam paint
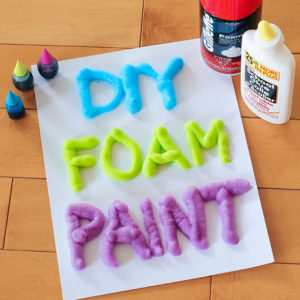
Credit: dabblesandbabbles.com
This one only requires three ingredients and offers tonnes of fun with minimal mess!
You will need:
– Shaving Cream
– PVA Glue
– Food Colouring
– A sturdy surface for the artist’s creation (e.g. light card or a piece of a cardboard box)
– Ziplock bags (one for each colour)
Method:
1. Mix equal parts shaving cream and glue in a ziplock bag with a few drops of your desired food colouring. Repeat this for each colour your artist needs for their masterpiece.
2. Make sure the bag in sealed and then they can squish and squeeze until it is all mixed together
3. Cut a hole in one of the corners and let the art begin!
4. Once the art is complete, leave it overnight to dry
2. Laser Maze
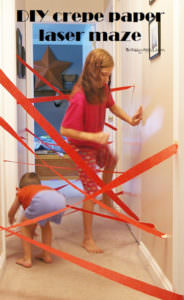
Credit: brassyapple.com
If your kids love to play make believe games, this one is for them! It is a great themed game for any upcoming birthday parties too!
You will need:
– Red Crepe paper streamers
– Blu-tac or painters tape (something that won’t damage the paint)
– A hallway or similar area
Method:
You can create it or have them do it themselves, though they may need some help taping up high!
1. Tape or tac the streamers to either side of the hallway, high and low! Try making different stages from easy to hard, so the more experience spies still find a level of difficulty. If suitable, try making the maze in your garden
2. After the spies are tired from their hours of adventuring, it is fast, and fun to clean up, so get them involved!
3. Marble Art
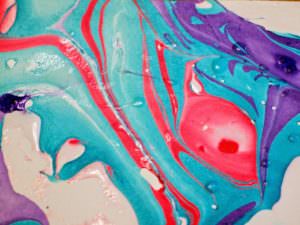
Credit: pinkstripeysocks.com
This is a great one for back-to-school time! Try using the art to cover school books for a more unique look.
You will need:
– Bottles of nail polish in your desired colours
– Something to cover your work surface
– Room-temperature water in a disposable roasting pan (deep enough to submerge your item)
– A surface to marble (e.g. card, art paper or even a mug)
– Disposable gloves or nail polish remover
– Toothpicks and skewers
Method:
1. Cover your work area to avoid mess and make sure you set up somewhere well ventilated, outside would work well
2. Put on some gloves to prevent the nailpolish staining your hands, otherwise wash your hands with nail polish remover after the fun has been had
3. Choose some nailpolishs the look nice together and start dropping them on to the surface of the water. CLICK HERE to find out what nailpolishs work best and how to do this for the best results
4. Use your toothpick to swirl the colours together
5. Dunk your paper or other item into the water slowly and pull out to reveal your masterpiece!
6. Use a skewer to get off any excess around the edges.
7. Allow the art to dry and the display appropriately!
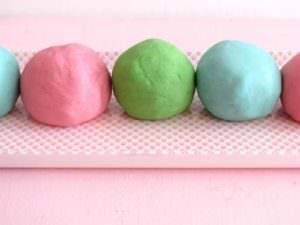
4. No-Bake Playdough
Credit: bestrecipes.com.au
This is a great one for the kids that like to fiddle, and because there is no cooking involved it is a great recipe for kids to get involve in too!
You will need:
– 2 cups flour
– 1 cup water
– 1 cup salt
– 1 tablespoon vegetable oil
– Desired food colouring
Method:
Each batch makes a decent amount so could easily be split in two or to make different colours.
1. Combine flour and salt in a bowl
2. Add water, food colouring and oil then mix until combined.
3. Knead well
4. If you want to separate the colours then don’t add the colouring until the mixture has formed a dough. Then you can split it and make different colours.
5. If it is too sticky, you can add some more flour until you are happy with it
6. Then play away!
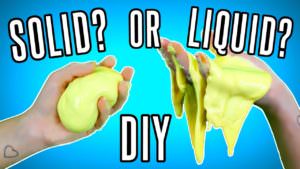
5. Oobleck
Credit: Pinterest user – The Multi Taskin’ Mom
Oobleck is an incredible toy! Not only does it allow for hours of fun, but also only require three ingredients that can be found in most pantries.
You will need:
– 1 cup water
– 1 ½ – 2 cups of cornstarch
– Food colouring
Method:
1. Pour all ingredients into a medium bowl or even a large ziplock bag to minimize mess
2. Mix the ingredients until well combined and start playing!
It is a great thing to play with outside as any spillages can be sprayed away with the hose!
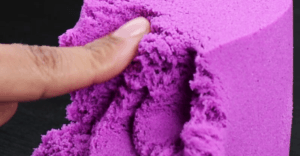
6. Kinetic Sand
Credit: babyfirstblog.com
This is a great project for kids that have fiddley fingers!
You will need:
– 1 cup sand
– 1 tablespoon cornstarch
– 1 teaspoon dish soap
– Water as needed
– Food colouring
Method:
1. In a bowl, mix sand and cornstarch together
2. Then add the dish soap and water
3. Finally add the food colouring of your choice and leave to dry for 1-2 hours. Once it is dry you can start playing!
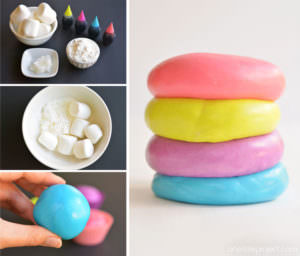
7. Edible playdough
Credit: onelittleproject.com
This one is definitely a treat! But it would be a great thing to make when decorating cupcakes!
You will need:
– 6 large marshmallows
– ¼ cup cornstarch (slightly heaped)
– 2 teaspoons coconut oil (slightly heaped)
– Liquid food colouring
Method:
1. Put the marshmallows, cornstarch and coconut oil into a microwave safe bowl
2. Microwave on high for 30 seconds until the marshmallows expand
3. Add the food colouring drops on top of the marshmallows or coconut oil (not to the corn starch). Then stir
4. When it gets too hard to stir, start kneading (be careful it might be hot)
5. If it’s too sticky, add more corn starch. If it’s still too sticky, add more coconut oil. Cover your hands in coconut oil to keep it from sticking to you.
6. Then it is time to start playing and creating! This website suggests using a non-stick surface such as baking paper or a silicone mat.
8. Ice Chalk
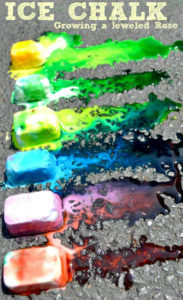
Credit: growingajeweledrose.com
This is a cool idea for a summer’s day
You will need:
– Cornstarch
– Baking soda (optional)
– Vinegar (optional)
– Water
– Food colouring
– Ice cube trays
Method:
Clean up is easy, because you can make these straight in the tray!
1. Fill each cube with about 30% baking soda and 40% corn starch.
2. Add a couple drops food colouring and mix
3. Freeze! For about 4-6 hours
Then, let the art begin! Use a spray bottle filled with vinegar to get some fizz, if you chose to use the baking soda.
9. Edible art
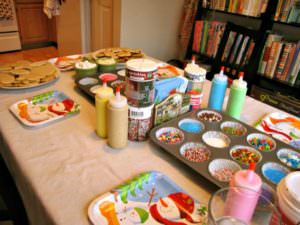
Credit: Pinterest users – Sugar Aunts & ohmeaghan.com
Bake some cupcakes and let the kids loose on the decoration station! You could even make some of the edible playdough to top them off! This would be perfect if you are entertaining a group of kids for the day.
You will need:
– Sprinkles, icing, ANY decorations
– Cupcake/muffin tins
– Spoons
Method:
Use the cupcake tins to house the different decorations, this saves the kids getting dirty hands in any bags! Might be a good idea to put down a table cloth or rubbish bag to make clean up a breeze! If you have older kids, they might even be handy when making the cupcakes.
10. Arts and Crafts
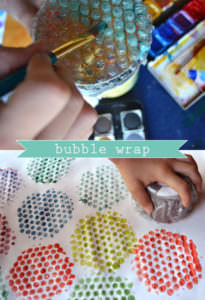
Credit: Pinterest user – Art Bar Blog
Try making art tools out of household items! Bubble wrap for example.
You will need:
– Bubble wrap
– A tin or rolling pin
– Tape
– Water colour paints
– A Paint brush
Method:
1. Cut a piece of bubble wrap out and tape to the top of a can or around a rolling pin
2. Paint the desired colour onto the bubbles and start making art!
You could simply frame it or as this website suggests, use it as wrapping paper!


